One of the great things about inkFrog is how it can help you to streamline and accelerate your eBay workflows, saving you hours and hours of work.
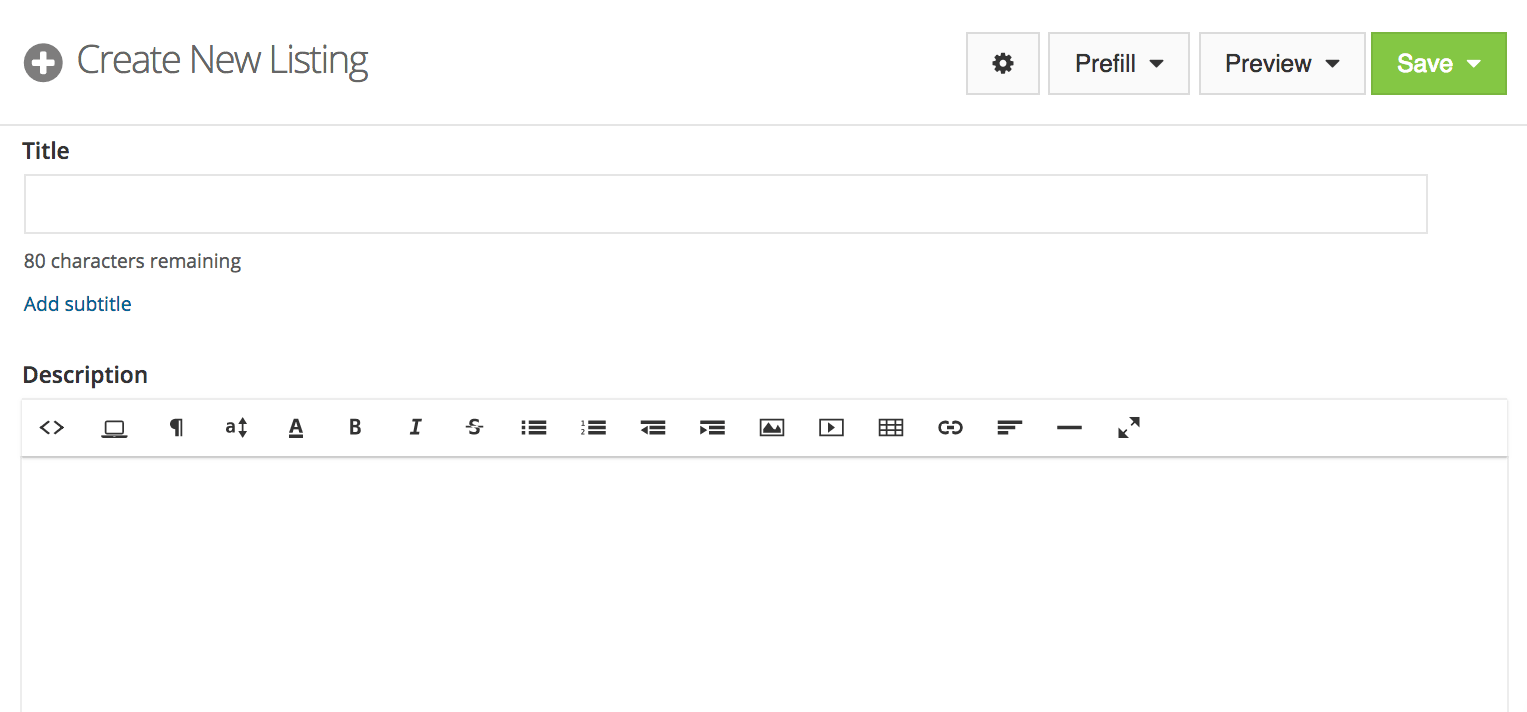
A simple, clean eBay listing form that's little more than a title box, a description box, and a link to upload images? You can have it with inkFrog.
Sometimes, saving mental clutter and needless scrolling is also a huge benefit, as these distractions can lead to accidental extra clicks and mental exhaustion by the end of the day.
Did you know that if you've already created profiles and customized templates for your inkFrog listings, you can significantly simplify the process of creating new eBay listings with inkFrog?
Here's how.
1. Create profiles and templates if you haven't already.
Though it's not absolutely required, you'll save the most time if you create default listing, shipping, payment, and return profiles for your eBay sales—and a library of the most common variations you'll use for each of these.
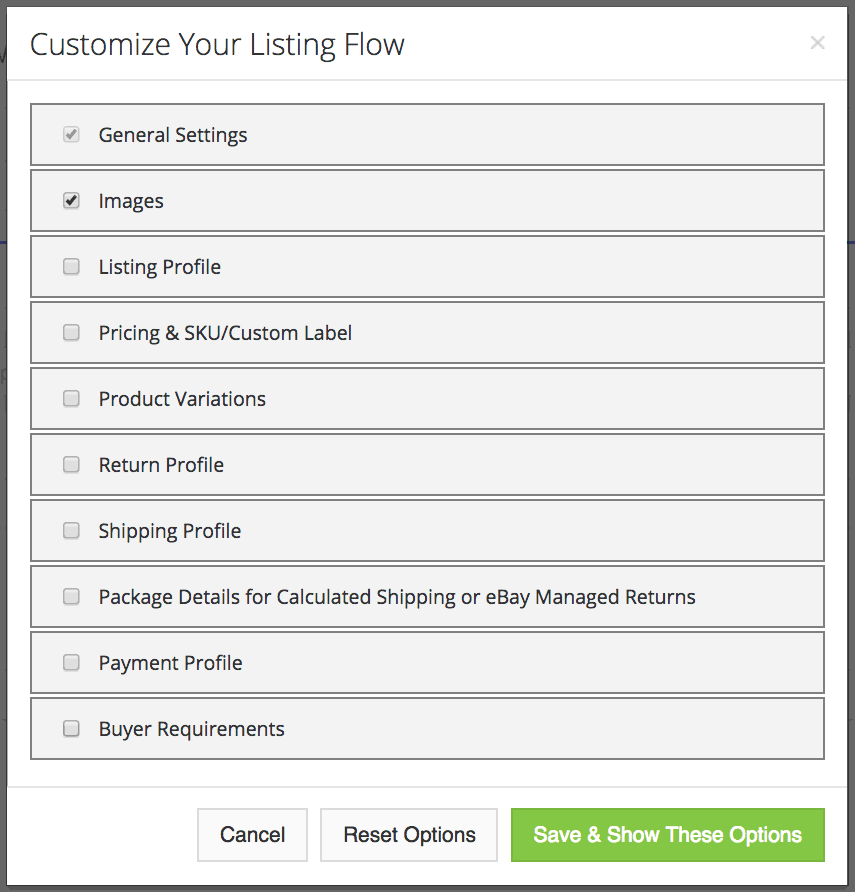
Click the cog icon in the listing creator to bring up this dialog. It enables you to hide parts of the listing form you've covered using profiles, so that you can pare down your listing creation workflow to include only the parts of the form that you need to focus on.
Take the time also to select a designer inkFrog template and apply the most common customizations to your template.
With these things done, you're ready to race through listing creation in the future.
2. In the listing creator, click on the "cog" icon.
At the upper left of the listing creator in inkFrog, there's a cog icon that enables you to customize the parts of the listing tool that will be expanded or visible by default.
Click on this cog to see a list of the parts of the listing form—a list on which you can cause various parts of the form to be enabled (expanded) or disabled (collapsed) each time you begin creating a new listing.
If you sell a narrow range of products or already have profiles created for each product, and rarely make changes to the contents of these parts of listings apart from applying an existing profile, you can simply uncheck them to hide them.
3. Use the drop-down profiles menu to apply particular profiles.
In cases in which your default listing profiles aren't correct, use the drop-down menu at the top-right of the listing creator to apply alternate pre-defined profiles for your listings.
Click "Prefill" to see the list of profile types and select the type of profile—master, listing, shipping, payment, or return—that you'd like to apply. In the pop-up menu that appears, select the profile you'd like to apply to the listing you're creating.
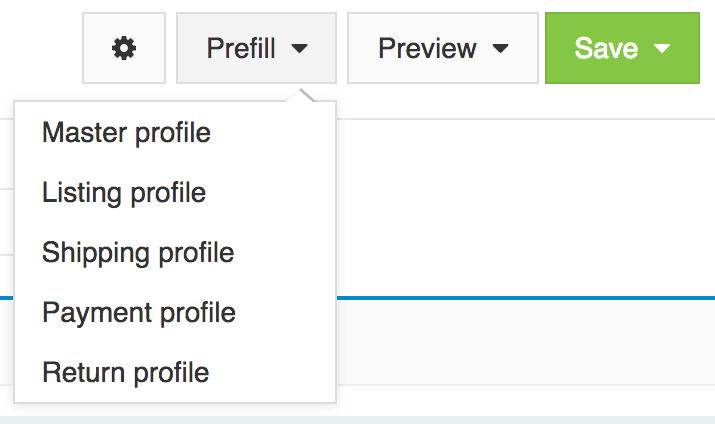
You can use the "Prefill" drop-down list to pre-populate hidden parts of the listing form using profiles that you've previously created, saving you time and distraction.
After you make your selection, the details from the profile in question will be applied behind the scenes—no need for your view of the listing you're currently creating to be cluttered by scads of details you've previously outlined.
4. Focus on the details unique to each listing.
With your listing creator view cleaned up by hiding areas you no longer need to directly edit each time you create a listing, you're free to focus on a shorter, cleaner listing form.
This enables you to speed through handful of items that do need to be customized for each newly created listing—for example, product images, title, and description, or whatever items you've left visible for your particular case.
Faster is Better
Little tricks like this—that enable you to pre-define profiles for the listings you create, then hide the parts of the listing form you no longer need to save you clicks, scrolling, time, and attention—are what inkFrog is all about.
And with your profiles, template, and listing creator view customized, you'll be able to race through the creation of new listings at double or triple the normal rate—with better accuracy and fewer mistakes, too.
Sound like you could use a tool like this? Try inkFrog today.
Share this article:


Join the Newsletter
Get started for free today!
Try it free
Join the 200,000+
using inkFrog!